Show Posts
Pages: [1]
1  Forums / Bikepacking / Re: Dragonfly Bikepacking setup: transverse saddlebag + qr cargo cages on: July 24, 2017, 02:48:14 AM
Finally started! Smiley If you want to learn more about bag you can visit Indiegogo webpage by clicking link below.

https://www.indiegogo.com/projects/dragonfly-bicycle-saddlebags-and-qr-cargo-cages-bike/x/16904174#/

I would be also glad if you could help bringing project alive by sharing it with your friends or contributing campaign. Thanks for any support! Smiley


2  Forums / Bikepacking / Re: Dragonfly Bikepacking setup: transverse saddlebag + qr cargo cages on: July 20, 2017, 12:25:17 PM
UPDATE! Sorry for not post anything for a longer time. I was really busy preparing for a INDIEGOGO

presale which starts next week!

I also made some improvements in my QR Cargo Cages. I am posting few more images

Large Saddlebag (about 22 liters / 500 g) with extended lid


Medium Saddlebag (about 12 liters / 300 g)


Quick Release Cargo Cage (each bag 7 liters)


(it comes in two options)


Quick Release saddlebag Mount


If you haven't seen the video yet:

https://www.youtube.com/watch?v=4bljg1glyzg
3  Forums / Bikepacking / Dragonfly Bikepacking setup: transverse saddlebag + qr cargo cages on: June 01, 2017, 06:49:09 AM
Hi, I wanted to share with you some information about my DIY bikepacking bags Wink

At first I needed a smaller bag which would replace my pannier during one day trips. I have a rack mounted in my vintage Gazelle Randonneur Trophy all the time – in this case I see transverse saddlebag as superior over saddlebag in classical shape.

I thought about buying Carriadice bag, but they use cotton duck which is to heavy for my taste :| My cycling setup would gain weight instead of loosing it, because pannier in same size is lighter.


I decided to make my own bag of Cordura which saved 400 grams without sacrificing functionality.  Finally I also added few useful features as additional bottom strap with buckle (yes, I am using buckles wherever it's possible), which makes attaching my bag to rack very fast and makes luggage more stable. I added a handle, now there is a way to catch the bag in less than a second – no need to attach shoulder strap every time...


I also made a QR mount which works with all my saddles. It has adjustable mounting width and added some “distance” (some saddles have their rails hidden you need some kind of a spacer).


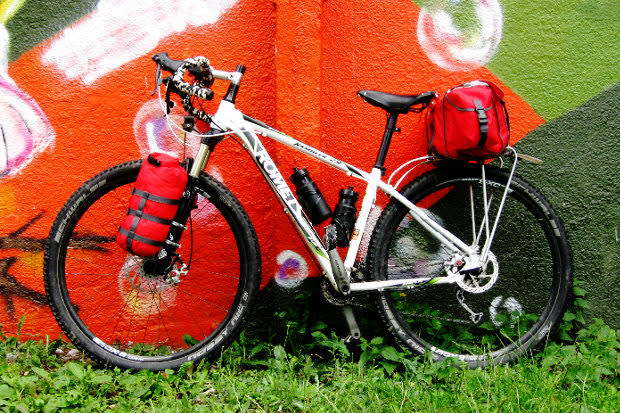
As I made my new MTB bike with dirt drop I thought about getting some cages for front fork. The problem is when you have suspension front fork /or you don't want to carry them all the time (and make our bike heavier ~400 grams forever ;((( ). For these reasons I designed my QR polycarbonate cage, which can work with suspension front forks or forks with eyelets.

HERE you can see my stuff in action:
https://www.youtube.com/watch?v=4bljg1glyzg

Feel free to share your thoughts about it and ask any questions.

I am planning to start a crowdfunding campaign with saddlebags in two sizes and the cargo cage and if you like my bag you'll be able to get it.
4  Forums / Bikepacking / Re: Introduction Thread on: November 04, 2016, 08:22:11 AM
Hi!!!

I am Tom, I am interested in DIY and bicycle touring. I started from road cycling - I appreciated ridding long distances, but than I found that with narrow tires I am loosing something  icon_scratch With each year I am using slightly wider tires.

I have five bikes but I will write about two of them. My first bikepacking machine is drop bar converted Fuji Sundance with 2x10 drivetrain.

On the way - testing my DIY carradice style saddle bag.

My newest bike is my own built of 29er with Salsa Woodchipper bars. On photo latest version of DIY saddle bag and my new DIY ultralight bag support.
Pages: [1]